Sep 23, 2019
Publish your Cloud Run App with GitHub Actions
A very fast way to deploy your application with GitHub
Implement custom logic without having to create an app to perform a task

I recently got access to GitHub Actions and I decided to test it with a simple deployment in ZEIT Now. My first steps were to look at this wonderful post from Leonhard Melzer.
It contains a lot of useful information but, unfortunately, it uses the old workflow syntax, which is now deprecated in favor of YAML. I spent a lot of time making the conversion, so here is an post on how I achieved it with a yml file.
As I mainly work with React, I will give you an example with a create-react-app application but feel free to use any other library you like.
Now requires a configuration file at the root of the repository, named now.json, which contain the app configuration on the hosted environment.
{
  "version": 2,
  "name": "github-actions-zeit-now",
  "builds": [{ "src": "package.json", "use": "@now/static-build" }],
  "regions": ["bru"],
  "routes": [
    { "src": "^/static/(.*)", "dest": "/static/$1" },
    { "src": "^/logo.png", "dest": "/logo.png" },
    { "src": "^/asset-manifest.json", "dest": "/asset-manifest.json" },
    { "src": "^/manifest.json", "dest": "/manifest.json" },
    {
      "src": "^/service-worker.js",
      "headers": { "cache-control": "s-maxage=0" },
      "dest": "/service-worker.js"
    },
    { "src": "^/precache-manifest.(.*)", "dest": "/precache-manifest.$1" },
    { "src": "^/(.*)", "dest": "/index.html" }
  ]
}
Sample now configuration file
Let’s consider the important parts of this file:
version: The configuration file version. You can simply use 2 as version 1 is deprecated.name: The name of our application used on the ZEIT dashboard. It will create a custom subdomain on your application.builds: How the application can be built. As I’m deploying a create-react-app, I use @now/static-build but there are many other options you might want to consider.regions: Where we want the application to be deployed. I chose bru to use GCP in Brussels, but you can choose your favorite one on that list.routes: Simply the mapping of where any incoming request should point. Note that everything unknown will be redirected to the index.html file.There is more! As the @now/static-build I use has some constraints, I need to respect them:
now-build script in the package.json file that will be run by the builder’s entry-point.dist folder, while create-react-app sets the content in a build folder.Putting everything together, our package.json file will look like this:
{
  "name": "github-actions-zeit-now",
  "version": "0.0.1",
  "scripts": {
    "build": "react-scripts build",
    "eject": "react-scripts eject",
    "start": "react-scripts start",
    "test": "react-scripts test",
    "now-build": "npm run build && mv build dist"
  }
}
To have a lighter gist, I only kept the name, version, and scripts keys
Okay, everything is now set for deployment. Our next step is to implement the appropriate GitHub Actions.
To create a new deployment workflow, we need to create a .github folder at the root of our repository. You might already be using it if you use the issue templates.
Then, add a workflows subfolder that will contain as many workflows as you want.
Next, we will create a YAML file that corresponds to the deploy workflow we want. You can create many files to create multiple workflows, one for the tests and one to deploy, as an example.
name: Deploy to Now
on: [push]

jobs:
  filteroutmaster:
    name: Filter out master branch
    runs-on: ubuntu-latest
    needs: [deploy]
    steps:
      - name: Filter out master branch
        uses: actions/bin/filter@master
        with:
          args: "branch master"

  publish:
    name: Publish to prod
    runs-on: ubuntu-latest
    needs: [filteroutmaster]
    steps:
      - name: Checkout the repository
        uses: actions/checkout@v1
      - name: Deploy on Zeit - Prod
        uses: actions/zeit-now@master
        env:
          ZEIT_TOKEN: ${{ secrets.ZEIT_TOKEN }}
        with:
          args: --prod

  deploy:
    name: Deploy
    runs-on: ubuntu-latest
    steps:
      - name: Checkout the repository
        uses: actions/checkout@v1
      - name: Deploy on Zeit
        uses: actions/zeit-now@master
        env:
          ZEIT_TOKEN: ${{ secrets.ZEIT_TOKEN }}
Now, let’s analyze what we wrote in the file:
name: A pretty name for the workflow which we will see in GitHub.on: When the workflow should be executed. There are a lot of events we can pick.jobs: The list of jobs to execute.
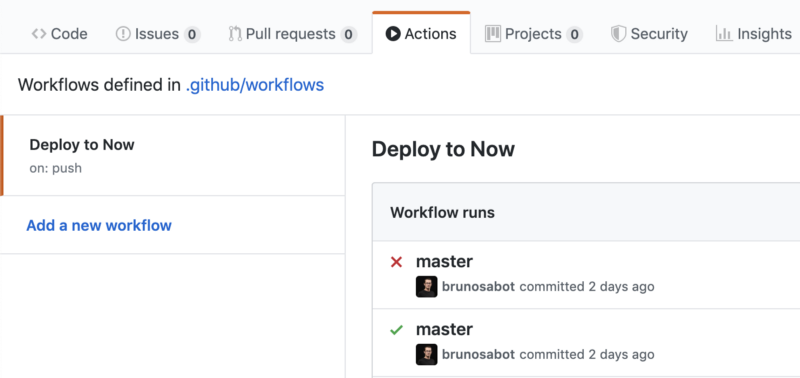
The jobs list in the GitHub interface
The jobs look almost the same. I will only present the publish one that contains more information than the others.
name: Once again, a pretty name to identify the current job.runs-on: The operating system that will execute the job. There are few possibilities listed here.needs: The jobs required before executing this one. GitHub Actions are smart; they will follow the needs order so you don’t have to worry about how you have your jobs sorted. You will see that illustrated in the screenshot below.steps: The list of actions to executeOnce again, let’s dive in to see how steps are configured:
name: Guess what? A pretty name for the action!uses: Finally, the action to execute. There are plenty of actions available. The two I use are actions/checkout@v1 to get my repository files and actions/zeit-not@master for the ZEIT-Now related actions. The anatomy of the action is to have the repository first (e.g. actions/checkout), then the branch we want to use (e.g. master).env: The environment variables stored within the GitHub interface.with: Allows the configuration of actions with some variables. In this example, we just want to add the -prod args to the now command that will be executed.
With the jobs on the left and the steps on the right
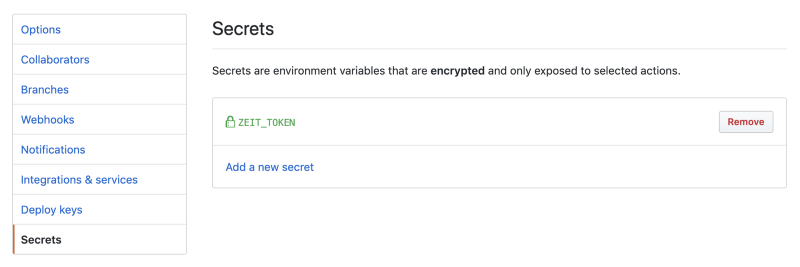
In the YAML file, we use a ZEIT_TOKEN secret. You can set it in the Settings menu, where we can find a Secrets menu. Once you add a secret, you will not be able to get the value again.

Setting up GitHub Actions was a bit complicated at first, especially because the stories you can find on the internet use the old syntax. But, in the end, everything is pretty simple and functional for a beta feature.
There is, of course, more to say on the usage, considering the build performance, for example. But that will be the content of another story. Stay tuned!
I enjoyed exploring the API and I hope you will be as excited as I am to start digging into the Actions!